IONYX Support Centre
Frequently asked questions
Check that the silicon cable is properly connected to the white coupling and is then connected to the lip electrode, which should itself be in the patient’s mouth.
The motor may be damaged; it should be returned to the After-Sales Service.
Check the state of the battery and charge the device if need be.
The apex indicated by the machine relates to the Dentino-Cemental Junction (DCJ).
Check the state of the battery and charge the device if need be.
If the contra-angle handpiece makes a clicking noise, it should be returned to the After-Sales Service.
Your irrigating agent must be too concentrated in terms of active chlorine; we recommend that you use an irrigating agent such as sodium hypochlorite with a maximum concentration of 2.5%.
PROTOCOL FOR USING HYPOCHLORITE
At a concentration greater than 2.5%, hypochlorite disrupts the root canal input measuring signal. This creates virtual apexes and/or measurement errors, particularly in the first coronal third.
Solution : Start the first coronal third using hypochlorite with a concentration less than or equal to 2.5%, and then use hypochlorite with a concentration of 5% (for example), leaving it for the time required for it to act. Rinse the root canal using hypochlorite with a concentration less than or equal to 2.5% and resume enlarging the root canal. Finish the treatment by using hypochlorite with a concentration of 5%.
This protocol is not exhaustive but should enable the measurement to be combined with a highly dosed irrigating agent, with the goal being to maintain impeccable root canal cleaning without detrimentally affecting the measurements and functionalities of the Endy 6200 and the Locapex Five.
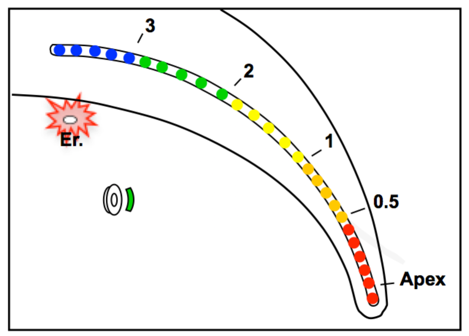
Excess irrigating agent: To make sure that the device is running smoothly, it is important to properly irrigate the root canal whilst at the same time keeping the pulp chamber completely dry. For a tooth suffering from gingival decay, the problem is the same, in addition to there being less possibility of isolating the root canal.
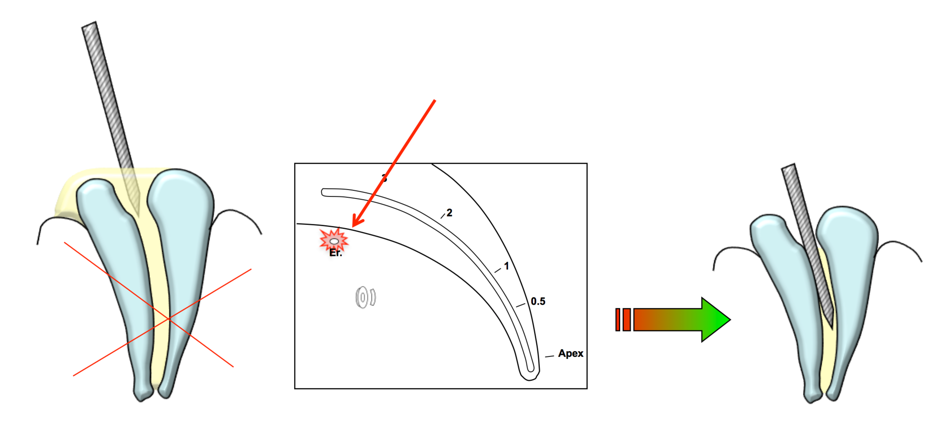
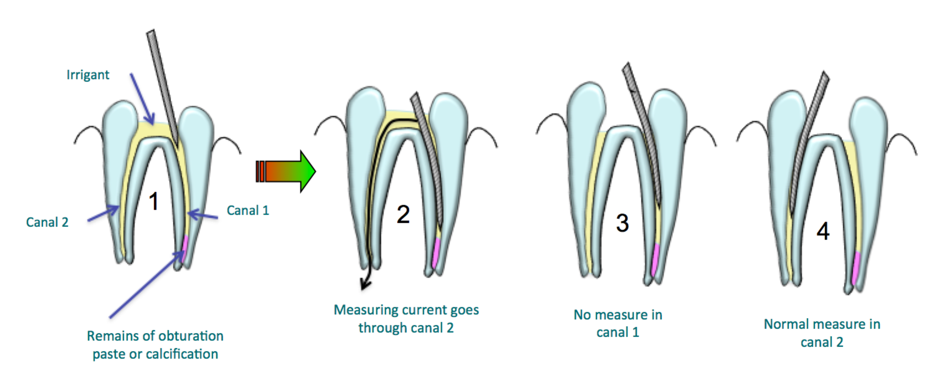
Measurement with 2 or more root canals :
1 – The pulp chamber is filled with hypochlorite electrically linking the two root canals.
2 – The apex locator indicates a contact at the entry to root canal 1, but no information regarding forward progress towards the apex is displayed on your locator’s screen. This means the current is passing through the other root canal.
3 – Solution : Dry the pulp chamber in order to isolate the two root canals. Redo the measurement in root canal 1. If the measurement does not start up, that means that the root canal is not permeable. Root canal 1 is still isolated using the root canal sealer.
4 – Take a measurement in root canal 2 as you would normally.
Conclusion: Always isolate the root canals in order to avoid mixing the information provided by your locator.
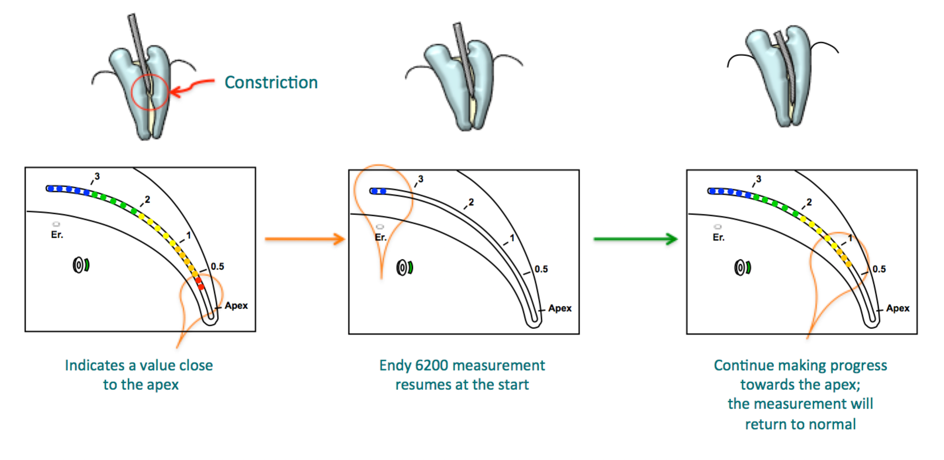
A problem relating to a constriction in the middle of the root canal :
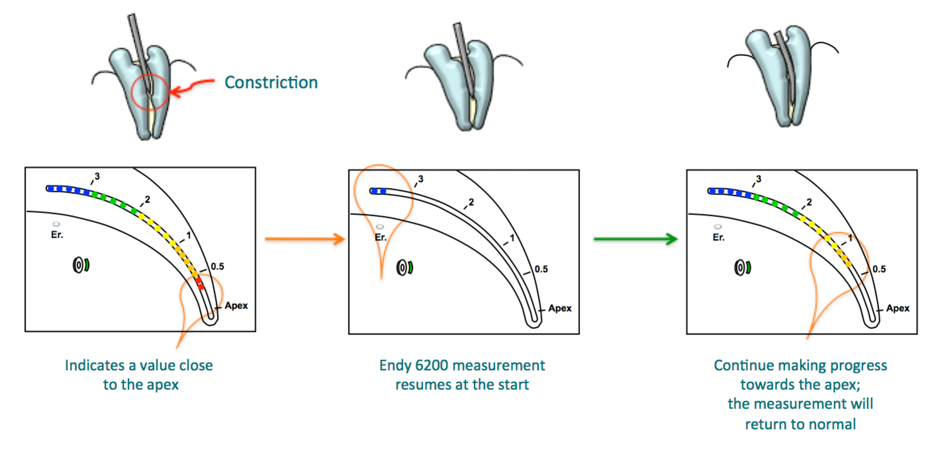
The locator announces an apex. The problem is resolved by having taken a pre-operative X-ray which provides sufficient information about the length of the root canal. The measurement will return to normal after passing through this constriction.
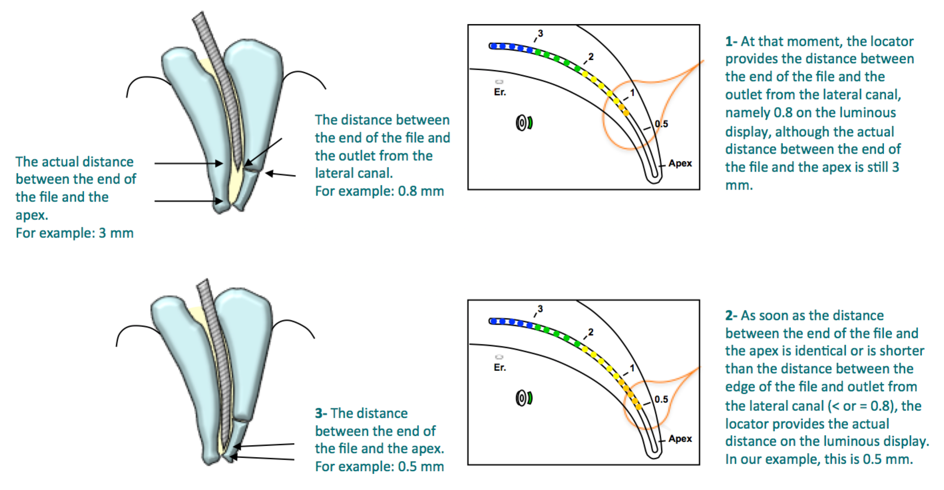
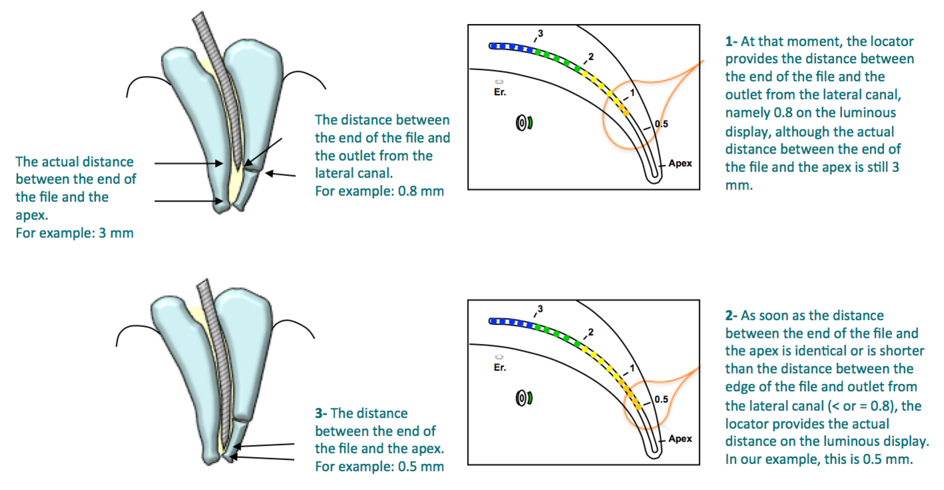
A problem relating to a lateral canal :
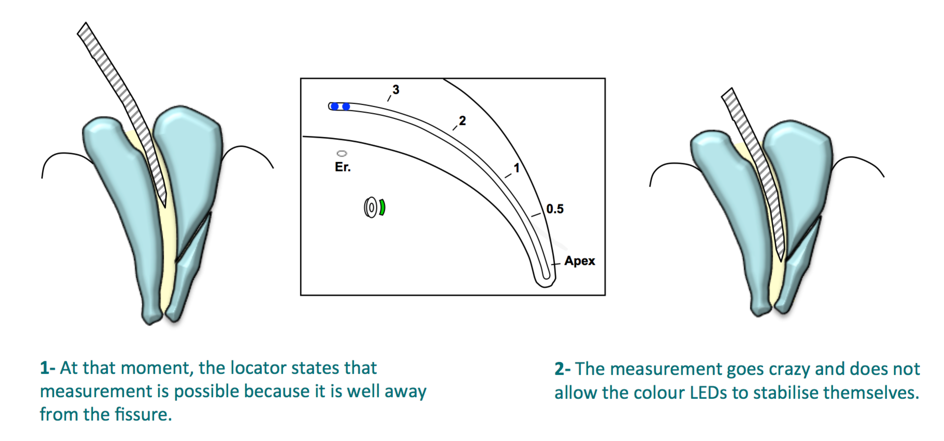
A problem related to a cracked tooth :
The measurement is normal up to the crack, and then it goes all over the place when it passes through it. Measuring becomes impossible. The difference between a lateral canal and a fissure: the canal resembles a tube and the fissure is a break in the tooth. There is no seal for measuring purposes.
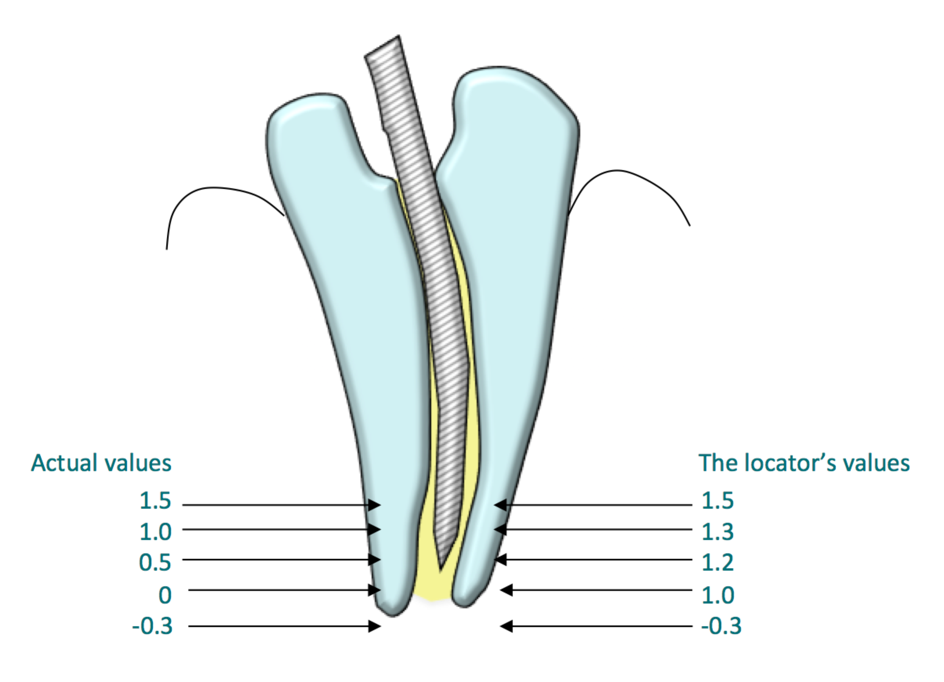
A problem related to an open apex/Measurement is only carried out when positioned very close to the Apex :
Upon approaching the open apex (1.5), the value provided by the apex locator almost stops varying. The measurement will return to normal at the foramen.
To sum up: To take a measurement in the case of an open apex, you have to find a negative value; place your stop on the file resting on the tooth. Take off one or two millimetres according to your choice.
As soon as the measure becomes negative, the display will show the actual value: Apex over.
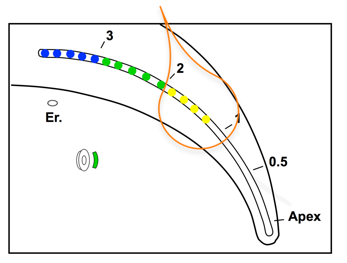
A problem related to a calcified root canal or the sealer in the root canal :

Behaviour of the locator depending on whether it is a wide or fine root canal :
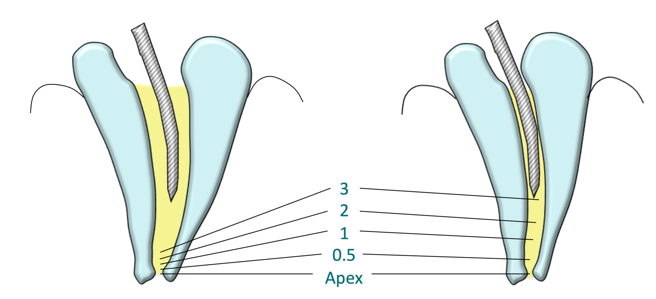
- In a wide root canal, the measurement begins closer to the apex
- In a fine root canal, the measurement starts higher up in the root canal
To reduce the effect, increase the diameter of the file as much as possible.
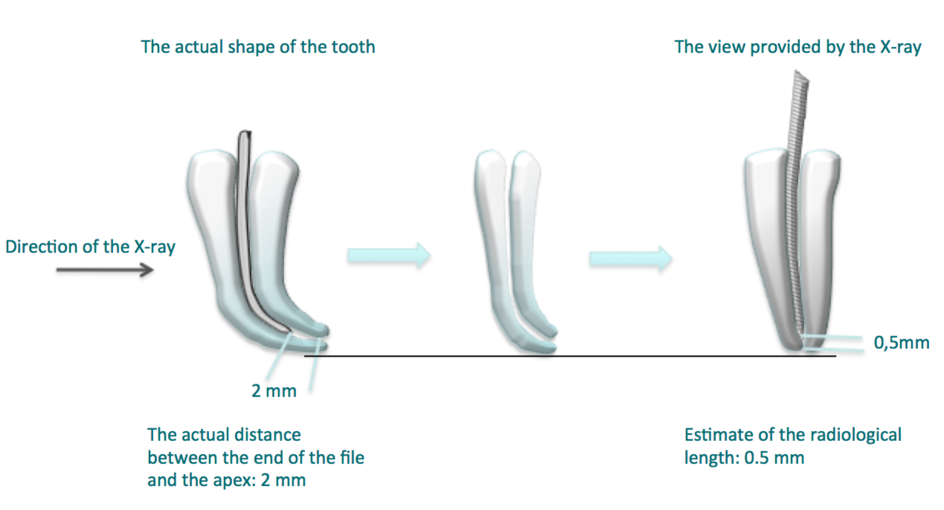
Difference between an X-ray measurement and an apex locator :
When your battery reaches the end of its life, this may cause the device to reset. In that case, it will restart with the factory parameters.
A problem related to a constriction in the middle of the root canal :
A problem relating to a lateral canal :
On certain new files, there may be a greasy film on the neck; this is due to the manufacturing process.
In order to obtain a reliable Apex measurement, it may be necessary to wipe the neck of the file with a paper towel in order to remove this greasy film.
It depends on your type of instruments. Each file has its own characteristics.
To know the parameters of tour instruments, click on the link corresponding to the reference of the files that you are using:
So you didn’t find the answer to your question? Then contact our After-Sales Service directly
Contact the IONYX After-Sales Service
Does your Endy 6000* seem to you to be obsolete?
IONYX is offering you an upgrade of it so you can change over to a superior version* for just € 710 (excl. tax)** (or € 850 (incl. tax))
(instead of € 1,710 (excl. tax) (or € 2,052 (incl. tax)) – the purchase price for a new one)! !
* Compatible with the Endy 6000 V1 and V2. Also possible to use it with the Endo Master.
** Excluding shipping costs.
